Assessing the Materials Needed for Leather Shoe Crafting
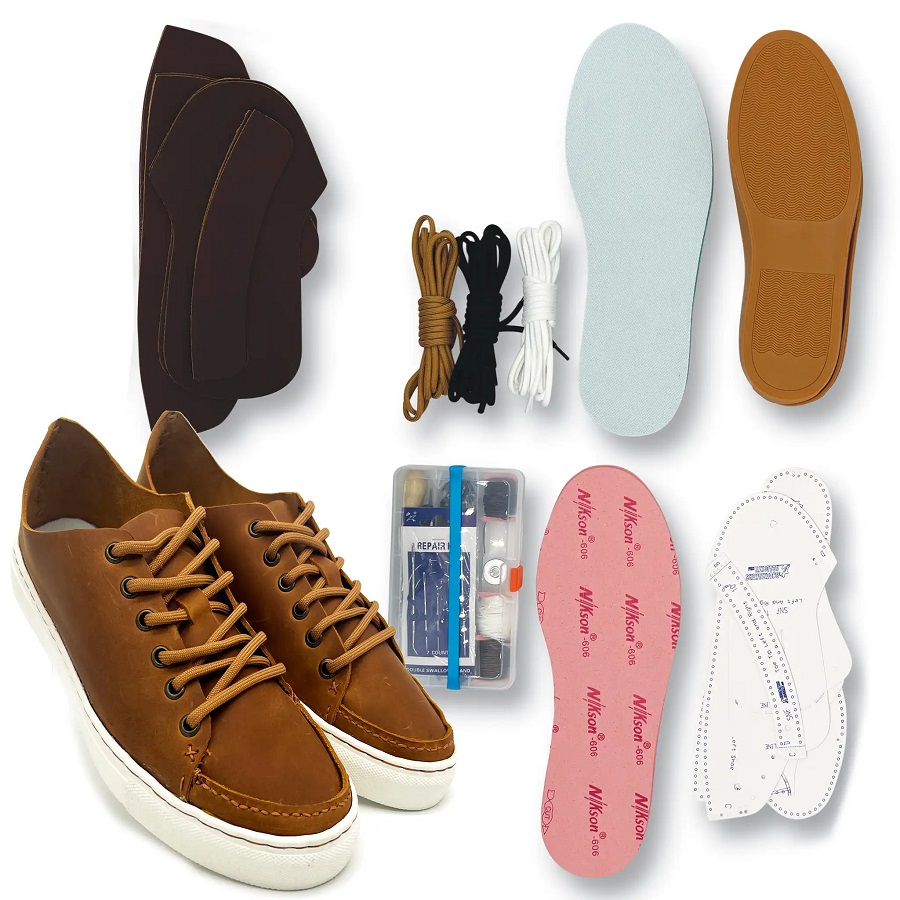
Before you start on your journey how to make leather shoes, it’s crucial to gather the right materials. Quality materials are the foundation of a solid pair of leather shoes. Here’s what you’ll need:
- Leather: Opt for a durable, yet flexible leather. Veg-tan or full-grain leather is ideal.
- Shoe Lasts: These are molds that give your shoes their shape. Choose the right size for a good fit.
- Soles: You can use leather, rubber, or a combination of both for the soles.
- Insoles: These should be comfortable and fit the lasts snugly.
- Thread: Strong, waxed thread will hold your pieces together securely.
- Adhesives: A durable shoe glue is necessary for some parts of assembly.
- Lining: Go for a softer leather to line the inside of your shoes.
Also, consider auxiliary materials such as eyelets, laces, and buckles if your design requires them. It’s worth taking the time to find high-quality components. They make a big difference in the comfort and durability of your handmade leather shoes.
 Designing Your Leather Shoes: From Concept to Pattern
Designing your leather shoes is where creativity meets practicality. First, decide on the style. Will they be boots, oxfords, loafers, or something else? Consider how you want your leather shoes to look and feel. The design should match your personal style and intended use. Begin with a sketch. This rough drawing helps visualize the shoe’s shape and structure.
Researching Shoe Designs
Investigate existing shoe designs for inspiration. Look at patterns for the type of shoe you want to make. Note the lines, seams, and where the shoe bends and flexes. Your research will guide you in creating a functional and appealing design.
Drafting a Shoe Pattern
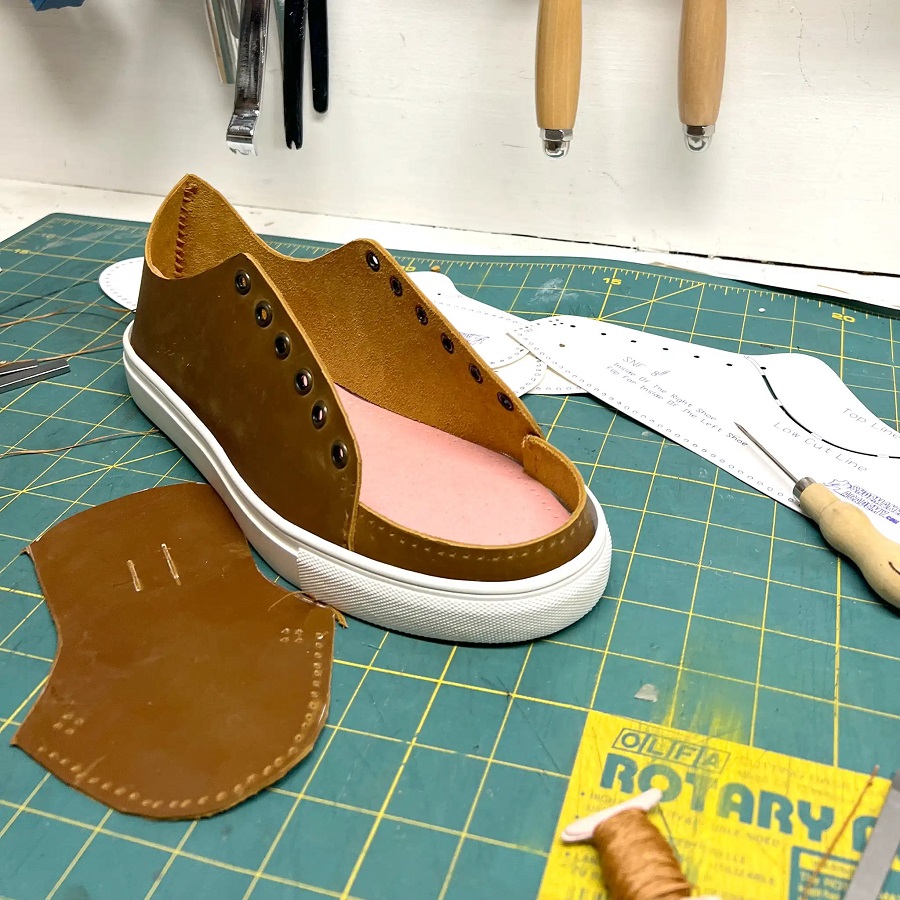
After your research, draft a pattern. Consider aspects such as seam placement and the allowance needed for a comfortable fit. Use paper to replicate the last’s shape; this will be your base. Add your design elements to the pattern. Cut the pattern pieces from the paper.
Adjustments and Refinement
Test the pattern by wrapping it around the last. Adjust for any discrepancies. The paper pattern is a prototype, so refine it until it’s perfect. Once you are confident with the paper pattern, transfer it onto a sturdier material. Cardstock is a good option for repeated use.
Remember, designing leather shoes is an iterative process. It is okay if the first pattern is not perfect. With each adjustment, you will learn more about how to make leather shoes that are both stylish and comfortable.
Cutting the Leather: Techniques and Best Practices
Once you have your pattern, the next step in how to make leather shoes is cutting the leather. This stage demands precision as mistakes in cutting can lead to wasted material and ill-fitting shoes. Here are some techniques and best practices to follow:
- Choose the Right Tools: A sharp leather-cutting knife is essential. Keep it well-maintained for clean cuts.
- Stable Cutting Surface: Use a cutting board or a solid bench to ensure stability while cutting.
- Trace Patterns Accurately: Use a non-permanent marker to trace your pattern onto the leather. Double-check before cutting.
- Cut in a Single Pass: Aim to cut the leather in one smooth motion to avoid jagged edges.
- Maintain Even Pressure: Apply consistent pressure while cutting to ensure uniformity in thickness.
- Corner Precision: For sharp corners, use a smaller knife. This helps to navigate tight spots with more control.
- Utilize Scraps: Smaller leather pieces can be used for details like shoe straps or decoration.
- Safety First: Always cut away from your body and take breaks if you feel fatigued.
Adhering to these best practices helps in creating clean, precise cuts that are critical for the next steps of assembling your handmade leather shoes. Remember, patience is key. Take your time to ensure every cut is deliberate and accurate. Quality craftsmanship starts here.
Assembling the Shoe Parts: Stitching and Adhesive Methods
After cutting your leather, assemble the parts carefully. This step is crucial for how to make leather shoes that last. Let’s focus on stitching and using adhesives.
- Choose the Right Thread: Use a strong, waxed thread for durability and ease of stitching.
- Pre-punch Stitch Holes: Create even stitch holes to guide your needle. This makes for uniform stitches.
- Saddle Stitching: Learn this sturdy hand-stitching technique for maximum strength. It’s ideal for shoe assembly.
- Gluing for Reinforcement: Apply shoe glue to areas needing extra hold. Allow it to set properly.
- Combine Both Methods: Some parts of the shoe need stitching. Others, like attaching soles, require adhesive. Use both for best results.
- Clamping is Key: For parts glued together, use clamps to hold them while drying. This ensures a strong bond.
- Neatness Matters: Keep your stitches tidy for a professional look and long-lasting wear.
- Keep Tension Even: When stitching, maintain consistent tension to avoid loose threads or puckering.
- Trim Excess Threads: Once you finish stitching, trim any excess for a clean look.
Patience and attention to detail are important in this phase. Take breaks if needed to stay focused. Well-assembled shoes are not only durable but also more comfortable for the wearer.
Shaping the Shoes: The Lasting Process Explained
After cutting and assembling the leather pieces, it’s time to shape the shoes. This is where the lasting process comes into play. Lasting gives your homemade leather shoes their final form and ensures a precise fit. Let’s break down the steps involved:
- Position the Leather: Stretch the leather upper over the last. It should be snug but not overly tight.
- Secure the Leather: Use small nails or lasting pliers to attach the leather to the bottom of the last.
- Smooth Out Wrinkles: Work out any creases or folds. This step is vital for a sleek finish.
- Let the Leather Set: Allow the leather to adapt to the last’s shape. Some shoemakers leave it for a day or more.
- Attach the Soles: Once the upper is set, attach the soles using the method you’ve chosen, either stitching or adhesive.
- Remove the Last: Carefully take out the last without distorting the shoe’s shape.
Throughout the lasting process, it’s crucial to remember how to make leather shoes that are comfortable and fit well. Don’t rush. Take your time to adjust and smooth out the leather for the best result. Once the shoes have taken shape, you’re ready for the finishing touches like coloring and polishing. Shaping your shoes well is a skill that improves with practice, so keep at it!
Finishing Touches: Coloring and Polishing Your Leather Shoes
After shaping your shoes, it’s time to add the final aesthetic touches. How to make leather shoes stand out from the rest often comes down to coloring and polishing. These steps emphasize the beauty of the leather and provide protection.
- Choose High-Quality Dye: Pick a dye that is compatible with your leather. It should penetrate well and offer lasting color.
- Even Application Is Key: Apply the dye in thin, even layers to avoid streaks and spots. Let each layer dry fully before adding another.
- Seal the Color: Once you achieve the desired hue, seal the dye with a finisher. This step also adds a layer of protection against moisture and dirt.
- Time for Polish: Use a cream or wax polish that matches your leather. Rub it in circular motions for a deep shine.
- Buff to Brightness: After applying the polish, buff the leather. This will bring out a glossy finish that complements your handiwork.
- Protectors and Conditioners: Protect your shoes from the elements. Use sprays or creams designed to prolong the life of the leather.
Remember, coloring and polishing not only enhance the look but also extend the life and durability of your shoes. Stain evenly, polish patiently, and your leather shoes will look better and last longer.
Essential Tools for DIY Leather Shoe Making
Making leather shoes at home requires specific tools. You will need these essential items:
- Sharp Cutting Knife: For precise leather cuts.
- Lasts: The mold for your shoe’s shape.
- Punching Tools: To pre-punch stitch holes.
- Stitching Awl: For saddle stitching.
- Mallet: To hammer nails and set rivets.
- Measuring Tape: For accurate measurements.
- Adhesive: Strong glue to bond parts.
- Skiving Knife: To thin the leather edges.
- Needles: Durable ones for leatherwork.
- Waxed Thread: It resists fraying.
- Clamps: To hold glued parts as they dry.
Each tool has a role in how to make leather shoes. Start with quality tools for the best results. Practice with each tool to improve your skills. Your tools are partners in crafting durable and stylish leather shoes.
Troubleshooting Common Issues in Homemade Leather Shoe Production
When you learn how to make leather shoes, you may face some challenges. Let’s troubleshoot common issues:
- Uneven Stitches: This often happens if tension is not consistent. Practice keeping your stitching tension even.
- Wrinkles in Leather: Wrinkles can occur if leather is not stretched properly over the last. Be patient and work the leather evenly.
- Weak Seams: Use quality thread and proper saddle stitching technique to prevent seams from coming apart.
- Glue Not Holding: Make sure surfaces are clean and use the right adhesive. Allow enough time for it to set.
- Misshapen Shoes: This might happen if the last is removed too soon. Ensure the leather sets completely on the last.
- Color Streaks or Spots: When dying, apply thin layers and allow for drying time between coats. Seal with a finisher.
- Dull Finish: If polishing doesn’t shine, you may need to buff more. Use the right cream or wax.
- Leather Cracking or Drying: Use conditioners to keep the leather supple. Avoid extreme heat or cold.
Addressing these issues helps improve the durability and appearance of your homemade leather shoes. With each pair you craft, your skills will sharpen. Keep practicing and don’t be discouraged by small errors.


